
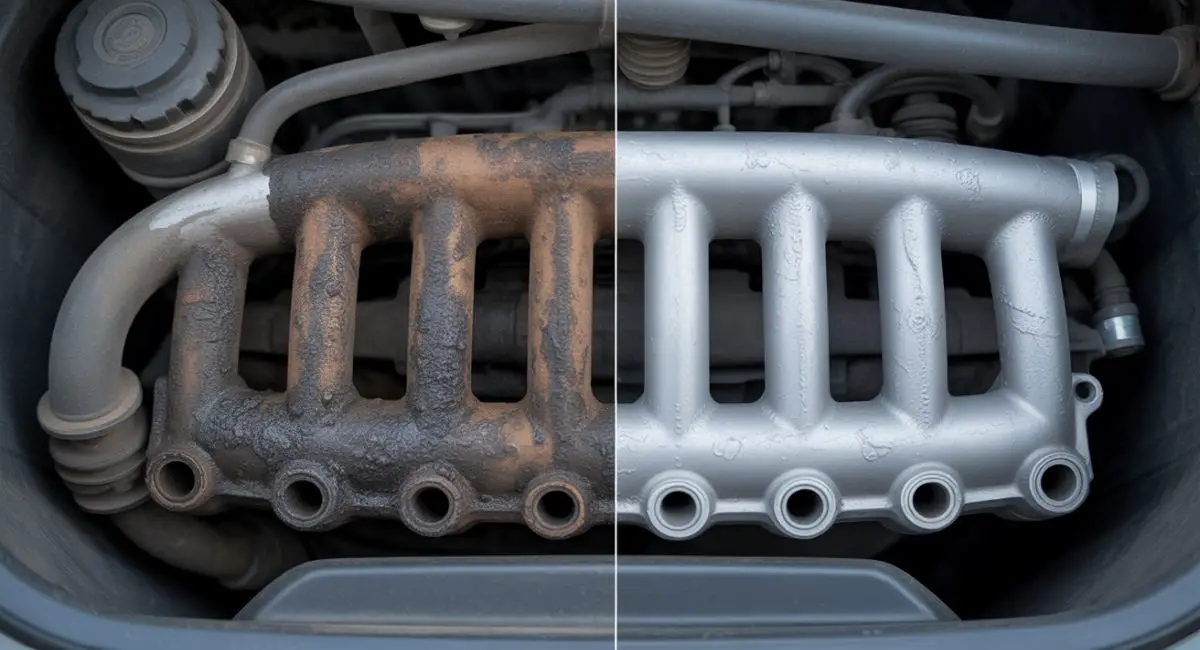
Your car’s intake manifold plays a critical role in keeping the engine running smoothly. It directs air into the cylinders for combustion, ensuring your vehicle performs at its best. But over time, dirt, carbon deposits, and oil residue can build up, choking airflow and robbing your engine of power. Cleaning it can restore performance, improve fuel efficiency, and save you from expensive repairs.
In this detailed guide, you’ll discover how to clean an intake manifold step by step. We’ll cover two key methods: cleaning it without removal for quick maintenance and tackling a deep clean by taking it off. Plus, we’ll dive into special tips for aluminum intake manifolds, which need extra care. Whether you’re a DIY newbie or a seasoned gearhead, this article has you covered with practical advice, tools, and visuals to make the process simple. Let’s roll up our sleeves and get started!
What Is an Intake Manifold and Why Clean It?
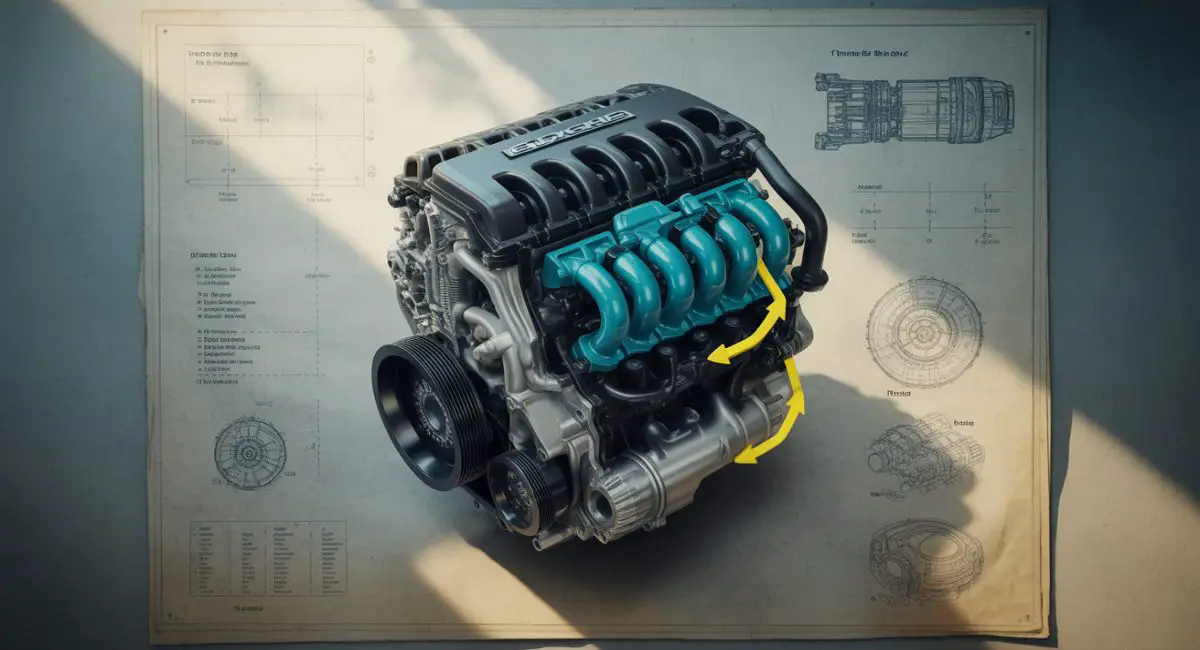
The intake manifold is a network of tubes that sits atop your engine. Its job? To deliver air—or an air-fuel mixture in older cars—from the throttle body to each cylinder. Think of it as the engine’s lungs. In modern vehicles, it handles air distribution, while fuel injectors add the fuel directly into the cylinders.
So why does it get dirty? Over miles of driving, carbon deposits from exhaust gases, oil vapors from the crankcase ventilation system, and debris from the air intake system settle inside. This gunk restricts airflow, throws off the air-fuel balance, and can lead to rough idling, sluggish acceleration, or even misfires. Aluminum intake manifolds, common in many cars, can trap more grime due to their porous surface, making regular cleaning even more vital.
Cleaning the intake manifold keeps your engine breathing freely. It boosts horsepower, smooths out performance, and helps you get more miles per gallon. Skip this maintenance, and you risk bigger problems like damaged sensors or vacuum leaks.
Tools and Materials You’ll Need
Before you start, gather your supplies. Having everything ready saves time and keeps frustration at bay. Here’s what you’ll need, split by cleaning method.
For All Cleaning Jobs
- Safety Gear: Gloves and safety glasses to shield against chemicals and debris.
- Cleaning Supplies: Carburetor cleaner or intake manifold cleaner (check for aluminum-safe options), shop rags, and a soft-bristle brush (a toothbrush works great).
- Inspection Tool: A flashlight to spot hidden grime.
For Cleaning Without Removing
- Air Tools: Compressed air canister or a shop vacuum to blow or suck out debris.
- Reach Tools: A long, flexible brush or pipe cleaner for tight spots.
- Extra Cleaner: Throttle body cleaner for the throttle plate area.
For Cleaning After Removal
- Disassembly Tools: Socket set, wrench, and a gasket scraper for old gasket material.
- Replacement Parts: New intake manifold gaskets (don’t reuse old ones).
- Precision Tool: Torque wrench to reinstall bolts correctly.
Quick Tip: Aluminum manifolds are sensitive. Double-check that your cleaner won’t corrode or damage the metal—look for “aluminum-safe” on the label.

How to Clean Your Intake Manifold: Step-by-Step
You’ve got two options: clean the manifold without removing it for a fast fix or take it off for a thorough overhaul. Let’s break down both methods.
Method 1: How to Clean Intake Manifold Without Removing
Perfect for light buildup or when you’re pressed for time, this method skips disassembly. Here’s how to do it:
- Set Up Safely:
- Park in a ventilated spot and let the engine cool down.
- Disconnect the battery’s negative terminal to avoid accidental starts.
- Expose the Throttle Body:
- Pop off the air intake duct (usually a few clamps or screws).
- Shine your flashlight inside to check the throttle plate and intake runners for dirt.
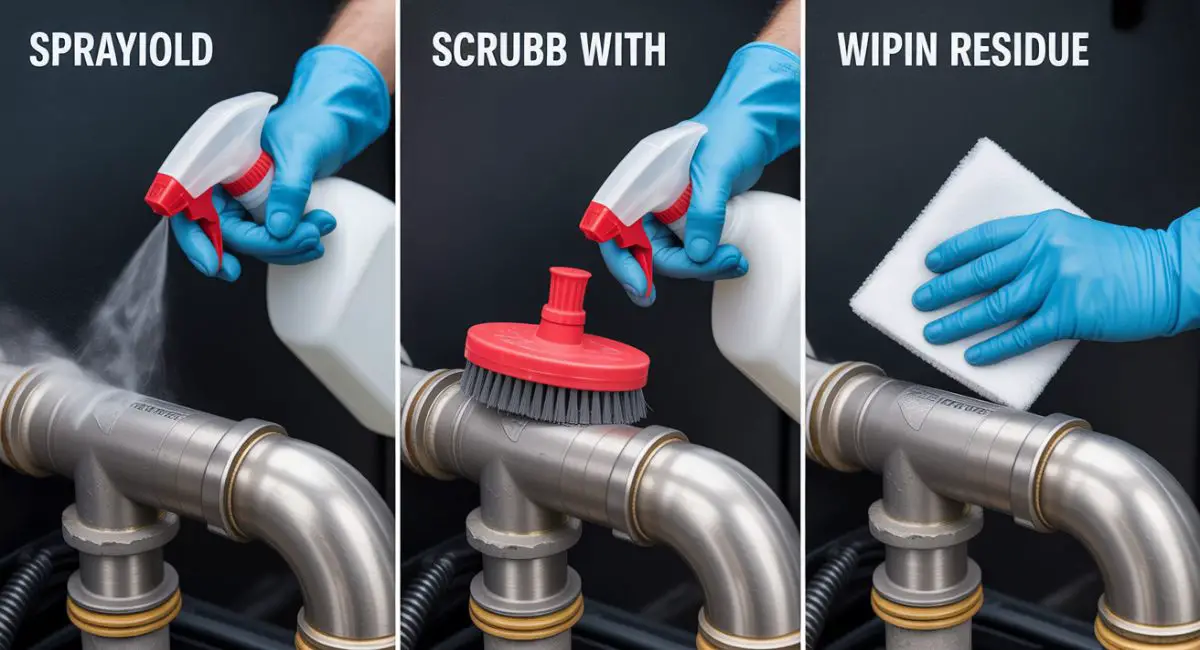
- Spray and Scrub:
- Hit the throttle plate and runners with throttle body cleaner or intake cleaner.
- Scrub gently with your soft brush. Use a flexible brush for deeper nooks.
- Wipe away loosened grime with a rag.
- Clear Debris:
- Blast compressed air into the runners to dislodge stubborn bits. Aim carefully to avoid pushing dirt deeper.
- Or use a shop vacuum to suck out loose particles.
- Wrap Up:
- Reattach the air duct and reconnect the battery.
- Start the engine and let it idle. Listen for odd sounds to confirm all’s well.
Best For: Routine upkeep or minor performance dips. It’s quick and doesn’t need advanced tools.
Downside: Heavy carbon deposits won’t budge with this method. You’ll need to remove the manifold for those.
Method 2: Cleaning the Intake Manifold After Removal
For serious buildup or aluminum manifolds needing a deep clean, removal is the way to go. Follow these steps:
- Prep the Engine:
- Disconnect the battery and remove parts blocking the manifold—like the air intake, throttle body, or fuel rails.
- Label vacuum lines, hoses, and connectors with tape or bags to avoid mix-ups later.
- Remove the Manifold:
- Undo the bolts with your socket set. Keep them in order (a tray helps).
- Lift the manifold off gently. It might stick, so wiggle it free.
- Clean Thoroughly:
- Scrape off old gasket material with a gasket scraper.
- Spray carburetor cleaner inside the runners and over the exterior.
- Scrub with your brush. Let tough spots soak for 10-15 minutes, then scrub again.
- Wipe or rinse (if the cleaner allows) until it’s spotless.
- Dry and Check:
- Air-dry the manifold or use compressed air to speed things up.
- Look for cracks or warping. Replace it if damaged.
- Reinstall:
- Set new gaskets on the engine.
- Lower the manifold back and hand-tighten the bolts.
- Torque them down with a wrench—check your car’s manual for the right specs.
- Finish Up:
- Reconnect all lines and parts.
- Hook up the battery, start the engine, and listen for leaks or rough running.
Best For: Heavy grime, aluminum manifolds, or when you’re already doing engine work.
Extra Step: Clean the throttle body while you’re at it—it’s right there and affects airflow too.
Cleaning Aluminum Intake Manifolds: What to Know
Aluminum manifolds are lightweight and popular, but they demand careful handling. Here’s why they’re tricky and how to clean them right.
Why Aluminum Needs Special Care
- Corrosion: Harsh cleaners can eat into aluminum, leaving pits or weak spots.
- Porosity: The metal’s surface holds onto oil and grime, making buildup tougher to remove.
Safe Cleaning Tips
- Pick the Right Cleaner: Go for aluminum-safe options like Simple Green or specific carb cleaners. Avoid caustic stuff like oven cleaner.
- Soft Tools Only: Use a soft-bristle brush—never wire brushes or abrasive pads that scratch.
- Dry Completely: If you rinse with water, dry it fully with air to stop corrosion.
- Protect It: For older manifolds, a high-temp sealant can guard against future gunk.
Bonus: Some folks polish aluminum manifolds for a showroom shine. It’s not needed for performance, but it looks cool!
Mistakes to Dodge When Cleaning
Even pros mess up sometimes. Steer clear of these common slip-ups:
- Wrong Cleaner: A harsh chemical can ruin gaskets or sensors. Stick to compatible products.
- No Labels: Forgetting which bolt or hose goes where wastes time. Label everything.
- Old Gaskets: Reusing them risks leaks. New gaskets are cheap insurance.
- Skipping Torque: Uneven tightening can warp the manifold. Use that torque wrench.
- Ignoring Nearby Parts: Don’t skip the throttle body or EGR valve—clean them too.
How Often Should You Clean It?
No strict schedule fits every car, but here’s a rough guide:
- Mileage Check: Aim for every 50,000–75,000 miles as part of big maintenance.
- Symptom Watch: Rough idle, power loss, or bad gas mileage? Time to clean.
- Heavy Use: Towing, dusty roads, or cheap fuel might mean cleaning more often.
Tip: Peek inside with a flashlight during oil changes to spot buildup early.
Why Bother? The Payoff of a Clean Manifold
Cleaning isn’t just busywork—it delivers real benefits:
- More Air, More Power: Clear runners mean better combustion and horsepower.
- Fuel Savings: Efficient air-fuel mixes stretch your gas further.
- Steady Idle: No more shaky stops at lights.
- Engine Longevity: Less strain on valves and pistons keeps things ticking longer.
Proof in Action: Turbocharged cars—like some VW or Ford models—often see a big throttle boost after a clean manifold.
When to Get Help
DIY is great, but some jobs need a pro:
- Thick Buildup: Heavy carbon might need walnut blasting, a shop specialty.
- Tricky Engines: Tight spaces or complex designs can stump beginners.
- No Gear: Lacking tools or time? A mechanic’s worth it.
Price Tag: Expect $100–$300 at a shop, based on your car and the mess.
Wrapping It Up
Cleaning your intake manifold is a hands-on way to revive your engine. Go the no-removal route for a quick tune-up or pull it off for a full refresh—either way, you’ll feel the difference. With the right tools, a little patience, and care (especially for aluminum), you can tackle this like a pro. Keep it clean, and your car will thank you with better power, efficiency, and a longer life. Ready to get started? Grab that cleaner and let’s make your engine breathe easy again!