
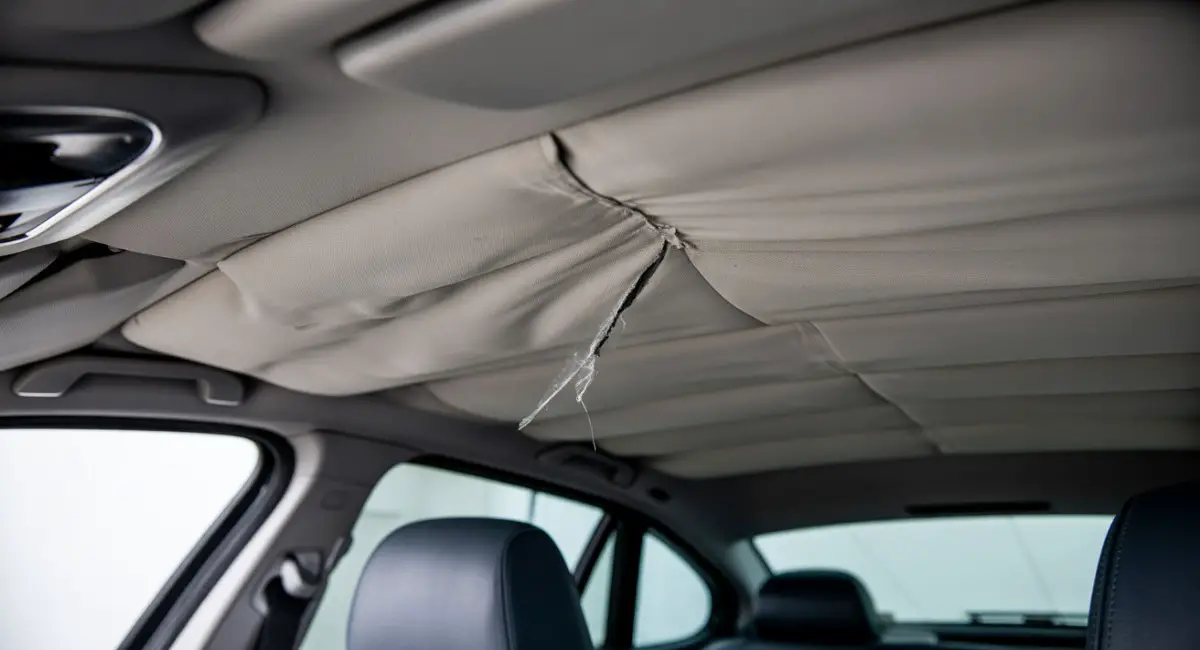
As a BMW owner, you take pride in the sleek design and luxurious interior of your vehicle. However, a sagging headliner can quickly diminish that premium experience. The headliner, the fabric lining the ceiling of your car’s cabin, not only adds to the aesthetic appeal but also serves practical purposes like noise reduction and temperature insulation. Over time, especially in BMWs exposed to heat, humidity, or simply the wear of age, the adhesive holding the headliner to its backing board can fail, causing the fabric to droop or detach.
A sagging headliner is more than just a cosmetic issue—it can obstruct your view, distract you while driving, or even indicate underlying problems like water leaks. Fortunately, you have options to fix this problem, ranging from quick DIY solutions to comprehensive repairs. This guide provides a step-by-step approach to fixing a sagging headliner in your BMW, tailored to both novice and experienced DIYers. We’ll cover quick fixes for minor sagging, a detailed process for replacing the headliner, and tips specific to BMW models. Whether you’re dealing with a minor droop or a major sag, this guide will help you restore your BMW’s interior to its former glory.
Understanding the Headliner and Why It Sags
The headliner in your BMW consists of a fabric layer, often cloth or suede-like material, bonded to a foam backing, which is attached to a rigid board made of fiberglass or cardboard. This multi-layered structure is secured to the car’s roof, providing a smooth finish, noise dampening, and insulation against external temperatures. In BMWs, known for their high-quality interiors, the headliner is designed to enhance the luxurious feel of the cabin.
Sagging occurs when the adhesive bonding the fabric to the foam or the foam to the backing board deteriorates. Several factors contribute to this issue:
- Heat Exposure: High temperatures, common in regions like Florida or during summer months, can melt or weaken the adhesive, causing the fabric to separate.
- Moisture: Leaks from sunroofs, windows, or door seals can seep into the foam, compromising its structure and leading to sagging.
- Age: Over time, the adhesive naturally degrades, especially in older BMW models like the E36 or E90 series.
- Poor Installation: If the headliner was improperly installed during manufacturing or a previous repair, it may sag prematurely.
In BMWs, sagging is a frequent complaint, particularly in models with sunroofs or those driven in hot, humid climates. A lot of forums often discuss sagging headliners in models like the X3 or 3-Series, noting that the foam backing can crumble, making repairs challenging.
Tools and Materials Needed
Before starting, gather the necessary tools and materials. The requirements vary depending on whether you’re opting for a quick fix or a full replacement.
For Quick Fixes
- Headliner Adhesive Spray: Choose a high-temperature adhesive like 3M Headliner Adhesive.
- Sequin Pins or Clear-Headed Twist Pins: Available at craft or automotive stores.
- Handheld Steam Cleaner: For the steam and roller method.
- Small Paint Roller: To smooth out the fabric.
- Soft Brush or Vacuum: For cleaning the headliner.
- Gloves and Safety Glasses: To protect against adhesive fumes and debris.
For Full Replacement
- Screwdrivers (Flathead and Phillips): For removing interior trim.
- Trim Removal Tools: To safely detach plastic clips and panels.
- Utility Knife: For cutting and trimming fabric.
- New Headliner Fabric: Purchase from automotive upholstery suppliers or online retailers.
- Sandpaper or Wire Brush: To clean the backing board.
- Adhesive Spray: Specifically for headliners, ensuring durability.
- Gloves and Safety Glasses: For safety during removal and adhesive application.
Having these tools ready ensures a smooth repair process. For BMW-specific repairs, check model-specific forums for additional tools, such as Torx screwdrivers for sunroof models.
Quick Fixes for a Sagging Headliner
If the sagging is minor or you’re looking for a temporary solution, these quick fixes can restore your headliner without removing it. These methods are budget-friendly and require minimal time, making them ideal for DIYers with limited experience.
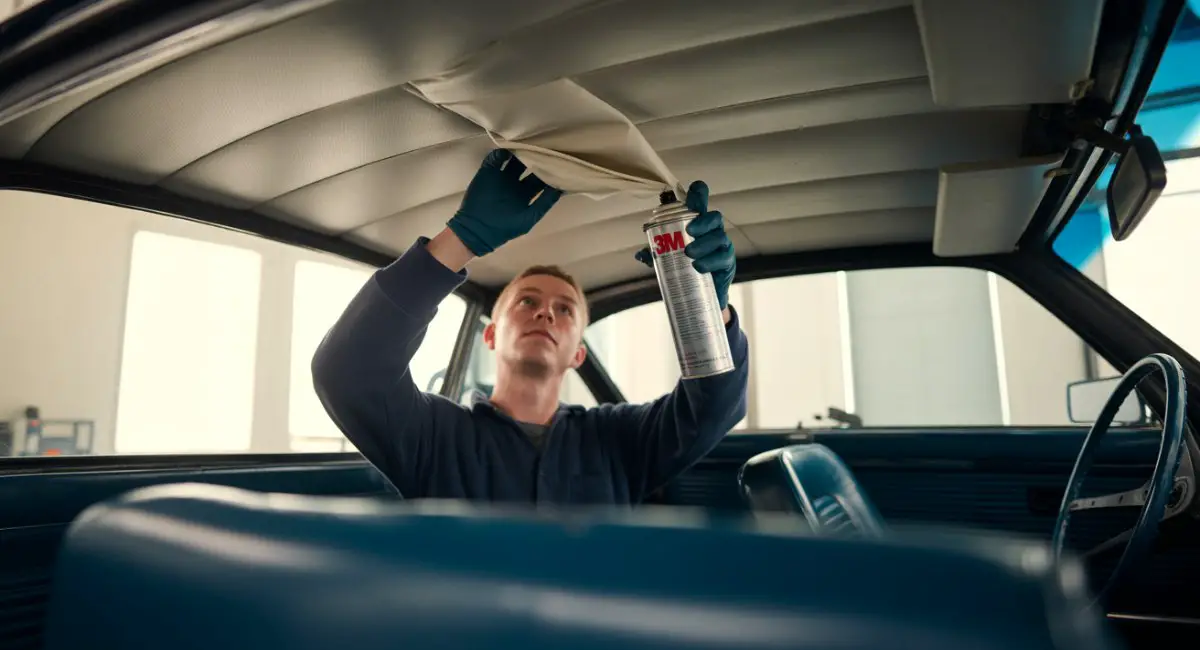
1. Gluing with Spray Adhesive
Using a headliner-specific spray adhesive is one of the most effective quick fixes for minor sagging, particularly along edges or corners.
Steps:
- Clean the Area: Use a soft brush or vacuum to remove dust and debris from the sagging section to ensure the adhesive bonds properly.
- Apply Adhesive: Spray a high-temperature headliner adhesive, such as 3M Headliner Adhesive, onto both the back of the fabric and the backing board. Follow the can’s instructions for even application and drying time.
- Press the Fabric: Starting from the center of the sagging area, smooth the fabric back onto the board, working outward to avoid wrinkles. Use a clean cloth or gloved hands to press firmly.
- Secure Temporarily: Use painter’s tape or pins to hold the fabric in place while the adhesive dries, typically for 24 hours.
Pros:
- Quick, often taking less than 30 minutes.
- Cost-effective, with adhesive cans costing $10–$20.
- Works well for small sagging areas.
Cons:
- May not last in hot or humid climates, as the adhesive can fail again.
- Risk of adhesive overspray, which can be messy if not careful.
Tip: Use a heat gun on a low setting to help set the adhesive, but avoid overheating to prevent damage to the fabric.
2. Pinning with Sequin or Twist Pins
Pinning is a fast, no-fuss method to secure a sagging headliner, especially when the sagging is widespread.
Steps:
- Select Pins: Choose sequin pins or clear-headed twist pins that are long enough to penetrate the fabric and backing board but not so long that they damage the roof.
- Insert Pins: Push the pins through the fabric into the backing board at regular intervals, focusing on the sagging areas. Arrange them in a grid or pattern for a cleaner look.
- Check Stability: Ensure the pins are secure and the fabric is taut without tearing.
Pros:
- Hawkins, a subreddit for BMW enthusiasts, suggests that quick fixes like pins may not look professional but can be effective for temporary repairs.
Cons:
- Pins may become loose over time, requiring reapplication.
- Can appear makeshift, which may not suit the premium aesthetic of a BMW.
Tip: Opt for clear-headed twist pins to minimize visibility and match the headliner’s color.
3. Steam Cleaner and Paint Roller
This method uses steam to reactivate the existing adhesive and a paint roller to smooth the fabric back into place.
Steps:
- Steam the Area: Use a handheld steam cleaner to apply steam to the sagging section, softening the old adhesive.
- Roll It Flat: Immediately after steaming, use a small paint roller to press the fabric back onto the backing board, starting from the center and rolling outward.
- Allow to Dry: Let the area dry for a few hours to ensure the adhesive sets.
Pros:
- Uses existing adhesive, reducing material costs.
- Effective for edge sagging where adhesive is still partially functional.
Cons:
- Less effective if the foam backing has deteriorated significantly.
- Risk of burns or fabric damage if steam is applied too long.
Tip: Test on a small area first to ensure the steam doesn’t damage the fabric.
Replacing the Headliner for a Permanent Fix
For extensive sagging or when quick fixes fail, replacing the headliner offers a durable, professional-looking solution. This process involves removing the headliner, cleaning the backing board, and applying new fabric. While more labor-intensive, it’s the best option for a long-term fix, especially in BMWs where a high-quality finish is desired.
Steps:
- Prepare the Vehicle: Park in a well-ventilated, well-lit area. Remove seats or other interior components if needed for access, particularly in models with curved roofs.
- Remove Interior Trim: Detach A, B, and C pillar trims, sun visors, grab handles, dome lights, and any other components securing the headliner. Use trim removal tools to avoid damaging plastic clips.
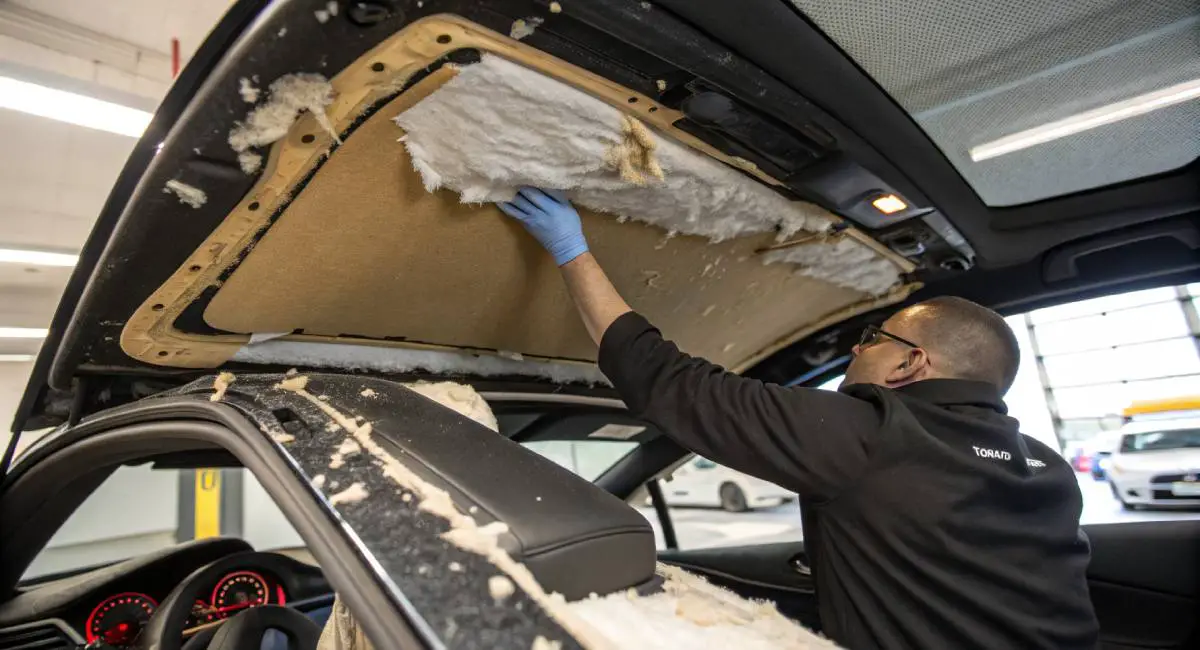
- Lower the Headliner: Carefully lower the headliner from the roof, maneuvering it through door openings. This step may require an assistant, especially for larger BMW models like the X5.
- Clean the Backing Board: Remove the old fabric and foam residue using a wire brush or sandpaper. Ensure the board is smooth and clean for optimal adhesion.
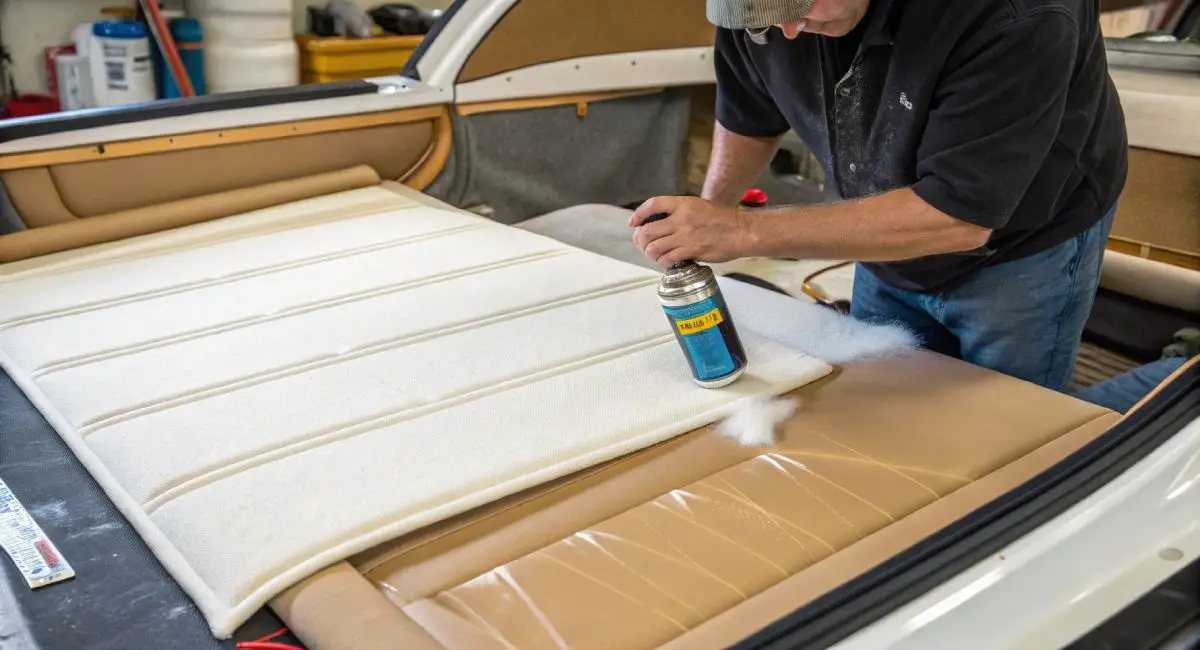
- Apply New Fabric: Measure and cut the new headliner fabric, leaving extra material for trimming. Spray adhesive on both the board and fabric, then apply the fabric, smoothing from the center outward to avoid wrinkles.
- Trim Excess Fabric: Use a utility knife to cut away excess fabric and create openings for lights, sunroofs, or sensors.
- Reinstall the Headliner: Reverse the removal process, ensuring all trim pieces and electrical components are securely reattached.
BMW-Specific Considerations:
- Sunroof Models: Models like the BMW X3 or 3-Series with sunroofs require extra care to avoid damaging the sunroof mechanism.
- Curved Roofs: Coupes like the E92 may have curved roofs, requiring careful folding of the headliner during removal to avoid creasing.
- Electrical Components: BMWs often have integrated lighting or sensors in the headliner. Disconnect and reconnect these carefully to prevent electrical issues.
Cost and Time Considerations
| Method | Cost | Time Required | Best For |
|---|---|---|---|
| Gluing | $10–$20 | 30 minutes | Minor sagging, temporary fix |
| Pinning | $5–$15 | 15–20 minutes | Widespread sagging, quick fix |
| Steam and Roller | $0–$50 (if buying steamer) | 30–60 minutes | Edge sagging, minimal materials |
| Full Replacement | $100–$200 (DIY) | 6–8 hours | Extensive sagging, permanent fix |
| Professional Repair | $300–$800 | 1–2 days | Severe damage, professional finish |
Preventing Future Sagging
To extend the life of your headliner and prevent future issues:
- Park in Shade: Avoid prolonged exposure to direct sunlight to reduce heat damage to the adhesive.
- Check Seals: Regularly inspect sunroof and window seals to prevent water leaks that can damage the foam backing.
- Clean Regularly: Vacuum the headliner to remove dust and debris that could weigh it down.
- Use Quality Materials: For replacements, choose UV-resistant, foam-backed fabric designed for automotive use.
When to Go Professional
Consider professional repair if:
- You lack the tools or confidence to handle interior disassembly.
- The headliner shows signs of mold or water damage, requiring specialized treatment.
- You want a seamless, factory-like finish that matches your BMW’s premium interior.
Professional repairs can cost $300–$800, depending on the shop and model, but they ensure a high-quality result. For DIYers, resources like this offers pre-cut headliner kits for BMW models, simplifying the process.
Conclusion
A sagging headliner in your BMW doesn’t have to ruin your driving experience. Quick fixes like gluing, pinning, or steaming can address minor issues in under an hour, while replacing the headliner offers a permanent solution for extensive damage. By following the steps outlined, using the right tools, and considering BMW-specific challenges like sunroofs or curved roofs, you can restore your car’s interior to its luxurious standard. Take your time, prioritize safety, and consult model-specific resources or professionals if needed. With these methods, your BMW’s cabin will look and feel as good as new.